Have no fear of crust. It’s easy to make and it’s relatively difficult to screw up. I swear by the food processor method, but down the road, we’ll talk other techniques as well.
In her own words: Williker’s Justifiably Famous Vinegar Crust
(Makes two 9-inch pie crusts)
Ingredients
15 oz. all-purpose flour
1 Tablespoon brown sugar
1 teaspoon sea salt
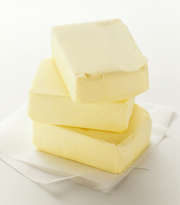
8 oz. cold butter
4 – 6 Tablespoons of a mixture of 1 cup cold water and 2 Tablespoons balsamic vinegar
In her own words: Williker’s Justifiably Famous Vinegar Crust
(Makes two 9-inch pie crusts)
Ingredients
15 oz. all-purpose flour
1 Tablespoon brown sugar
1 teaspoon sea salt
8 oz. cold butter
4 – 6 Tablespoons of a mixture of 1 cup cold water and 2 Tablespoons balsamic vinegar
Directions
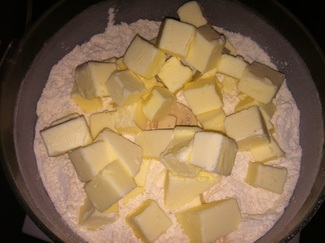
Combine flour, sugar and salt in food processor. Pulse 3 or 4 seconds to blend
Cut the butter into slices ¼ to 3/8 inch thick. It’s important that the butter be cold (even frozen is good). Add the slices to the flour mix and pulse about 10 times. Then scrape the sides and pulse another 4 times. You want the resulting mix to have a cornmeal consistency. This means the discreet little pieces of cold butter will create a nice flakey crust when baked!
The vinegar mixture should also be very cold. Maybe drop an ice cube in it. Add 4 Tablespoons of the vinegar mixture to contents of the food processor and pulse for a few seconds.
Scrape the sides and check the consistency of the dough by pinching it together. If it holds well without falling apart easily it’s done. If it crumbles apart add one more Tablespoon of the vinegar mix and pulse for another few seconds and check it again. You may need up to 6 Tablespoons of the mix total.
Notes: Perfect dough will still crumble a little. You don’t want it too wet and clay-like. You’ll get the feel for it after doing this a few times. Also, the remaining vinegar mixture can be stored in fridge for your next crust.
Dump the contents of the food processor onto a silicon mat (or a marble pasty board or even parchment paper – but not a tiled counter top!) and press into a large disc-shaped lump. Divide this in half and make each half into a smaller disc-shaped lump. If you’re into precision, each lump will weigh about 15 ounces. Wrap each lump in plastic and refrigerate for 30 minutes (or up to three days if you’re not quite ready to commit to a pie just yet).
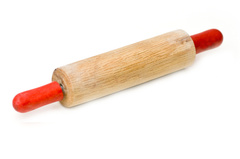
When you’re ready to roll out your crust, lightly dust the surface and rolling pin with flour. You may need to repeat this with your rolling pin several times, but avoid over-doing it because it can make dough too tough.
Unwrap the dough lump and lay it on the surface and start to gently roll it out into a large circle by rolling in different directions from the center. The cold dough will be difficult to work with at first, but it will get easier as it warms. The edges may break apart. It’s ok to press broken edges together or even fill in a crevice with excess dough from another side of your circle. Adjust the pressure you’re putting on the rolling pin to get a uniform crust 1/8th to 1/16th inch thick.
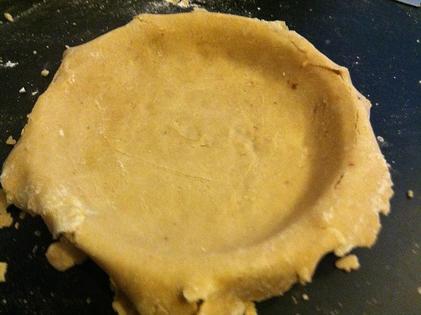
If you’re working with a silicon mat you can place the pie plate upside down on the dough and flip it over and gently loosen the dough into the pie plate. Do not pull.
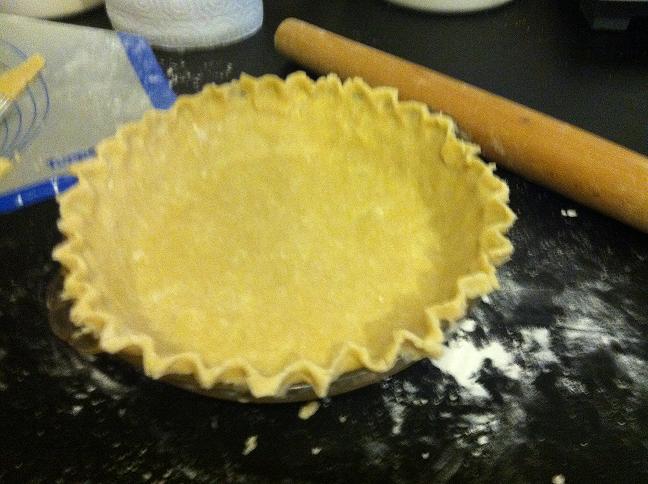
The crust should hang over the edges of the pie plate. I use a fork to trim off the excess from the edges because the natural curve of the fork keeps a better shape on the crust. Again, if you have gaps in your crust you can use the excess to fill them in.
Depending on the recipe, you’re going to either freeze the empty crust briefly, blind bake it, or fill it and top it with the second crust
When you’re ready to roll out your crust, lightly dust the surface and rolling pin with flour. You may need to repeat this with your rolling pin several times, but avoid over-doing it because it can make dough too tough.
Unwrap the dough lump and lay it on the surface and start to gently roll it out into a large circle by rolling in different directions from the center. The cold dough will be difficult to work with at first, but it will get easier as it warms. The edges may break apart. It’s ok to press broken edges together or even fill in a crevice with excess dough from another side of your circle. Adjust the pressure you’re putting on the rolling pin to get a uniform crust 1/8th to 1/16th inch thick.
If you’re working with a silicon mat you can place the pie plate upside down on the dough and flip it over and gently loosen the dough into the pie plate. Do not pull.
The crust should hang over the edges of the pie plate. I use a fork to trim off the excess from the edges because the natural curve of the fork keeps a better shape on the crust. Again, if you have gaps in your crust you can use the excess to fill them in.
Depending on the recipe, you’re going to either freeze the empty crust briefly, blind bake it, or fill it and top it with the second crust
 RSS Feed